how to build a
movable doll body
Workshop
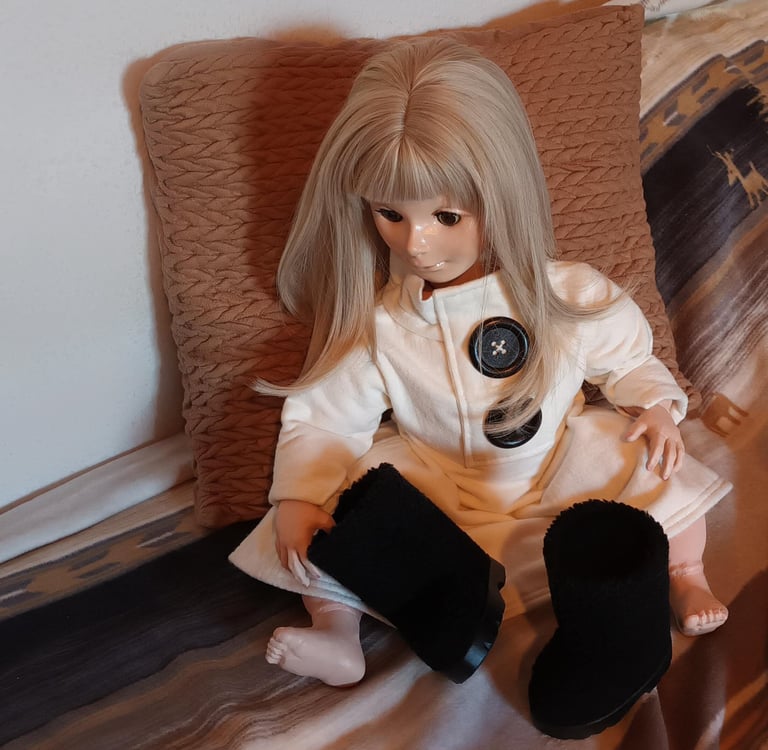

polyester fabric, not too elastic or any other fabric that does not shed (there are special puppet polyester fabrics on the market)
darning cotton
EVA foam (10mm thick) and foam clay
construction foam or styrofoam
light acrylic structure paste
priming, painting and sealing stuff for the foam parts
hot air gun, hot glue gun, sculping tools, brushes, sponges, sharp knife, sewing tools, cling film, masking tape, duct tape, permanent marker, pens, paper or lighter cardboard
a doll head
maybe a matching wig
tools and materials
You'll need:
If you found a lovely doll head for your cosplay partner, look for some pics of hands and feet.
Take yourself enough time and make a size plan of the whole doll including hands and feet depending on your own height.
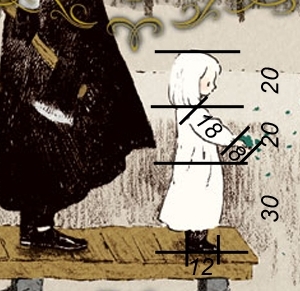

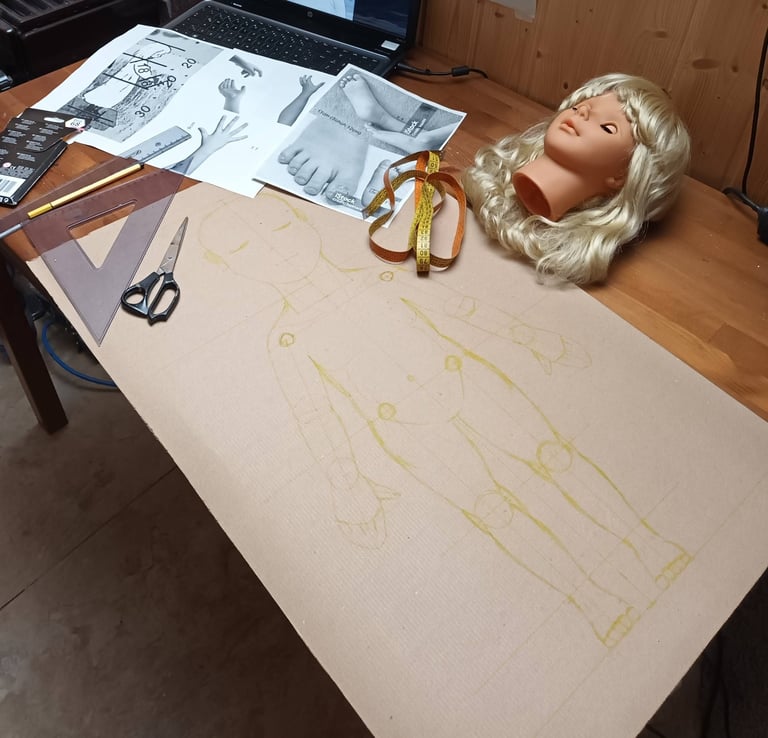


For a better imagination and to control individual body parts during production an 1:1 drawing or print of the whole body and detailled limbs is recommended.
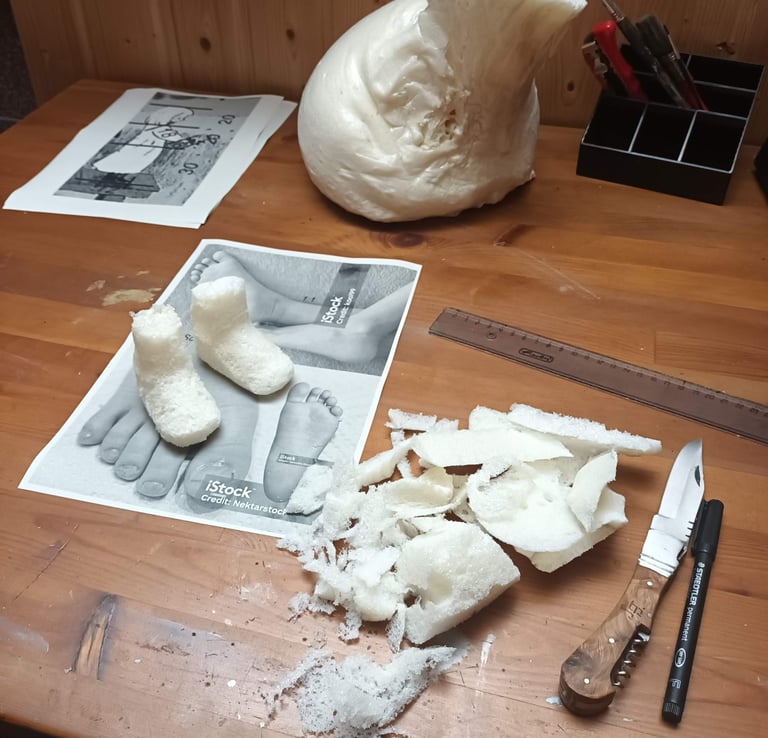
Take the construction foam or styrofoam and a sharp knife and carve torso, arms, legs and feet. If you wish to build very small feet you could also use EVA foam as a base. I took construction foam cause the feet with 11cm length would need lots of EVA and gluing processes.
first steps
side notes
It would also be enough if you carve one of each body part and mirror the sewing pattern later, but I decided to carve all parts cause I like some sculping training and wanted to have a full body as an insensitive sewing dummy for her clothes later,
I prefer using rests of construction foam cause the small parts are not so sticky and it is smoother to cut. A few air bubbles below 1-2cm width should not be a problem for the pattern making.
Envelope the carved parts with painter's tape and mark their side of the body. Check the size with your 1:1 drawing and take a good look on the depth, too.
Can they be placed in a natural position?
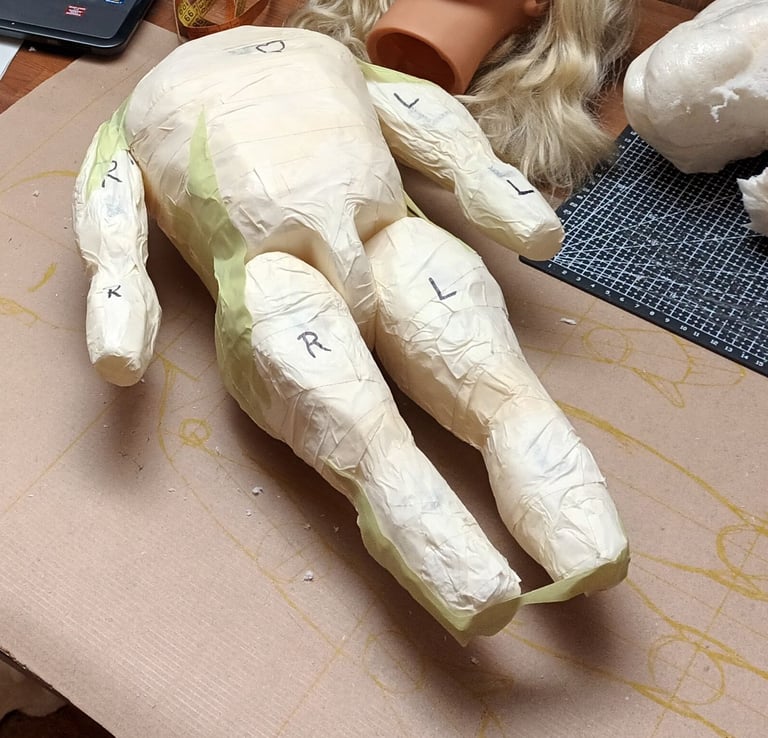

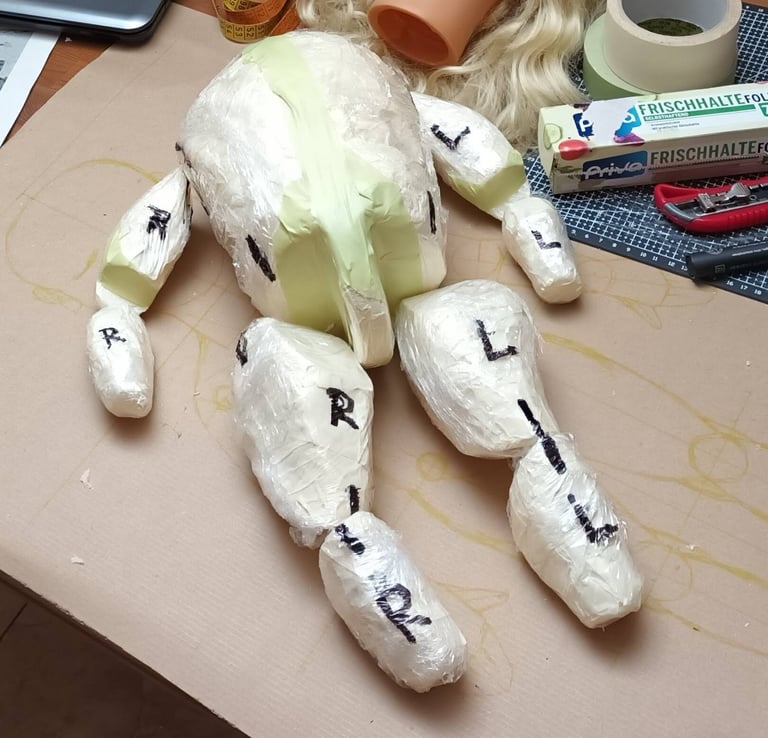

Cut the parts apart and think about movement options. You can see that I let space where joints would be. The lines are the positions where wider rubber cords would be attached later as some kind of tendons.
Now go on with the common pattern making process:
wrap all parts tightly with cling film
repeat marks on the film
wrap it again with duct tape
cut the wrapping till it lays flat in front of you
transfer it to thick paper if you want and mark all necessary points
transfer the parts to fabric and cut them out, don't forget to add some ~2 extra cm for sewing them together
planning the doll body
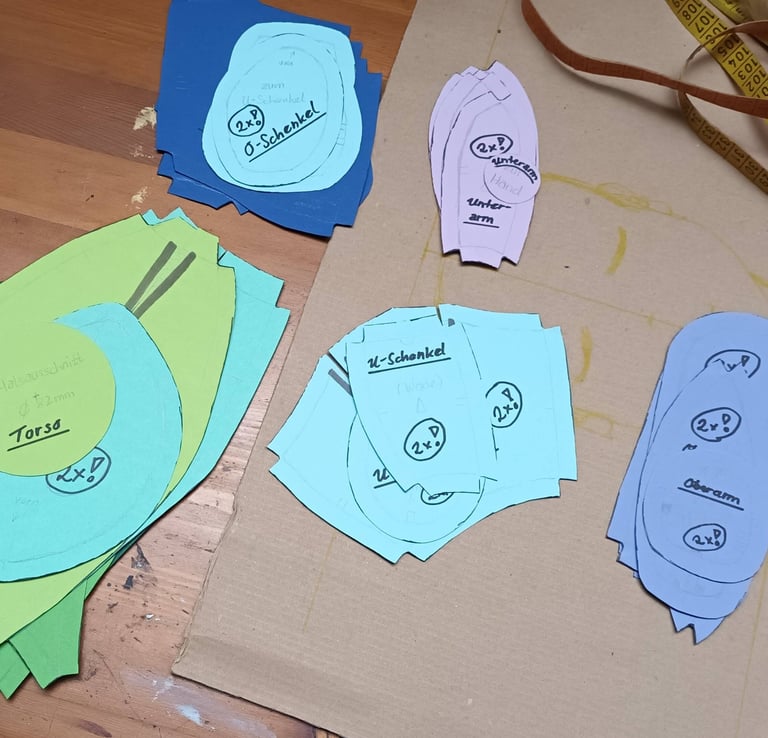
Here you can see my pattern parts out of thick paper width sewing allowance and lots of notes that make it easier not to lose the overview cause there very plenty of similar parts.

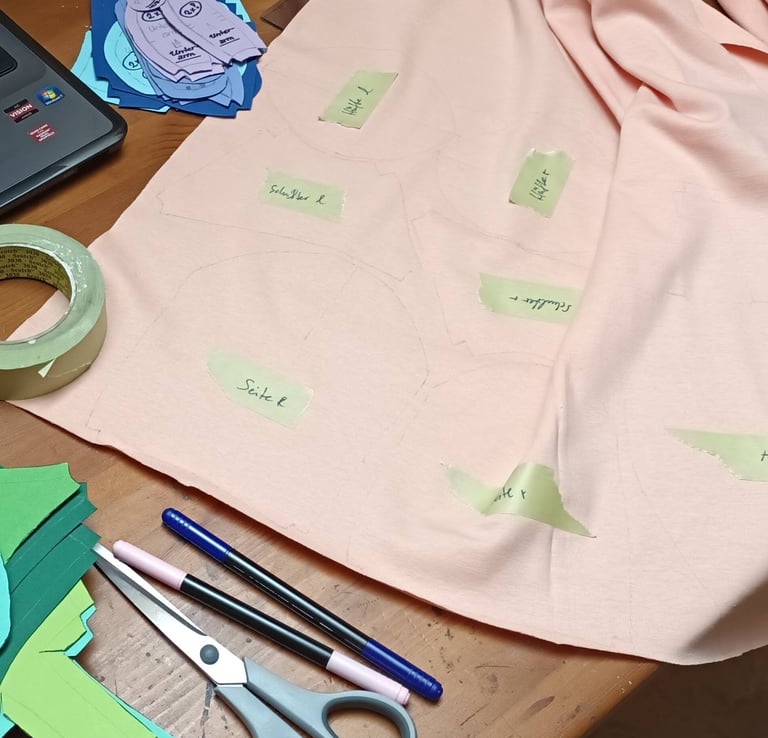

While transferring it to the fabric I used a permanent pen in a very similar color and add part names with light adhesive tape.
sewing the doll body
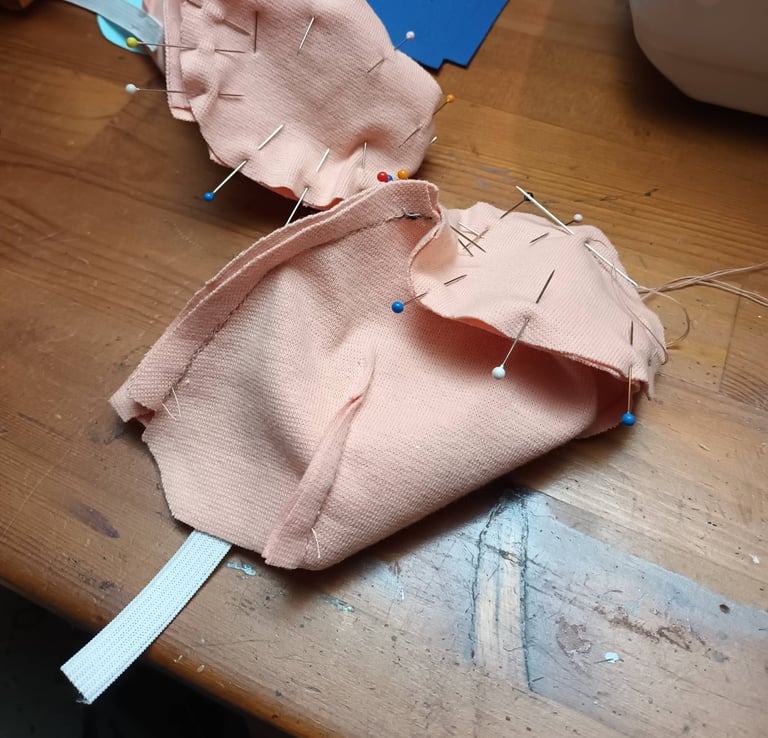

Lots of sews can be closed with the sewing machine, but some stuff like closing body parts will need to sewn by hand. Don't forget the connection ribbons.
Sculp the palms with foam clay and cut the fingers out of 10mm EVA foam. For the thumbs I used foam clay, too cause they need to bigger thicker than 10mm.
Give a bit extra length to the fingers so you could connect them to the palms easier!
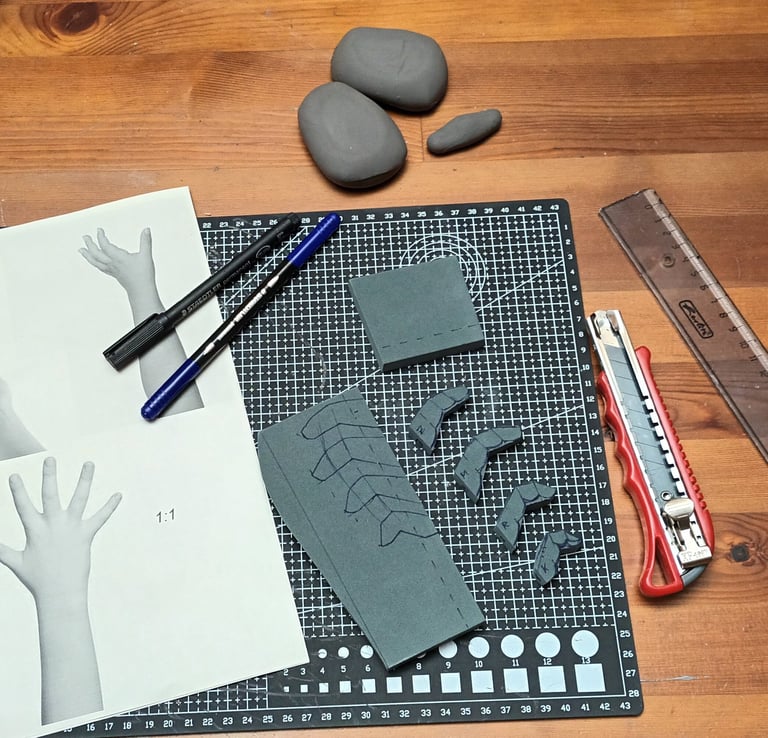

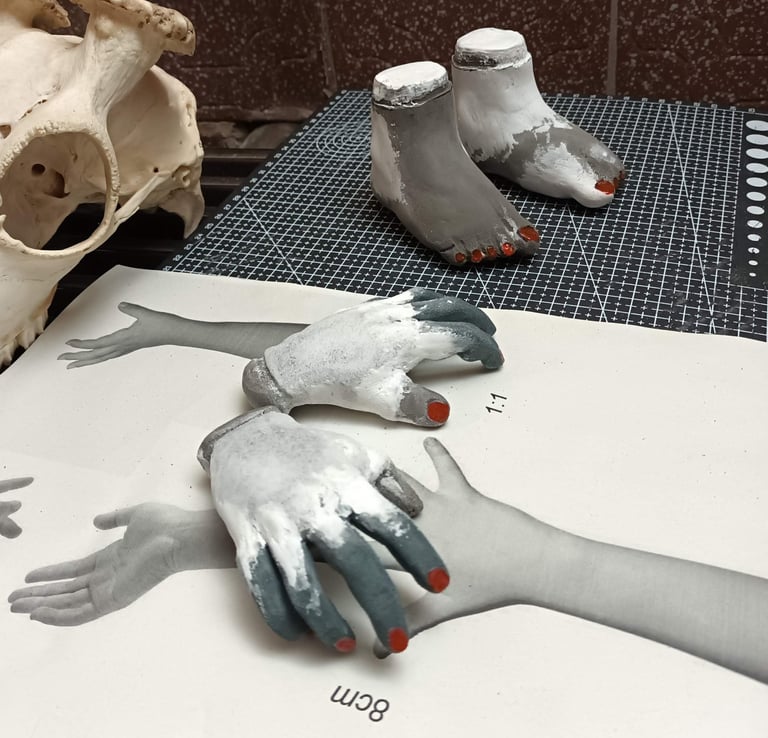

The feet get a layer of foam clay over the construction foam and you will now form the toes. Transitions between connected parts could be closed with foam clay and smoothened with light acrylic structure paste. I added nail paint to all nails for a smoothier and shinier appearance later.
making doll hands and feet
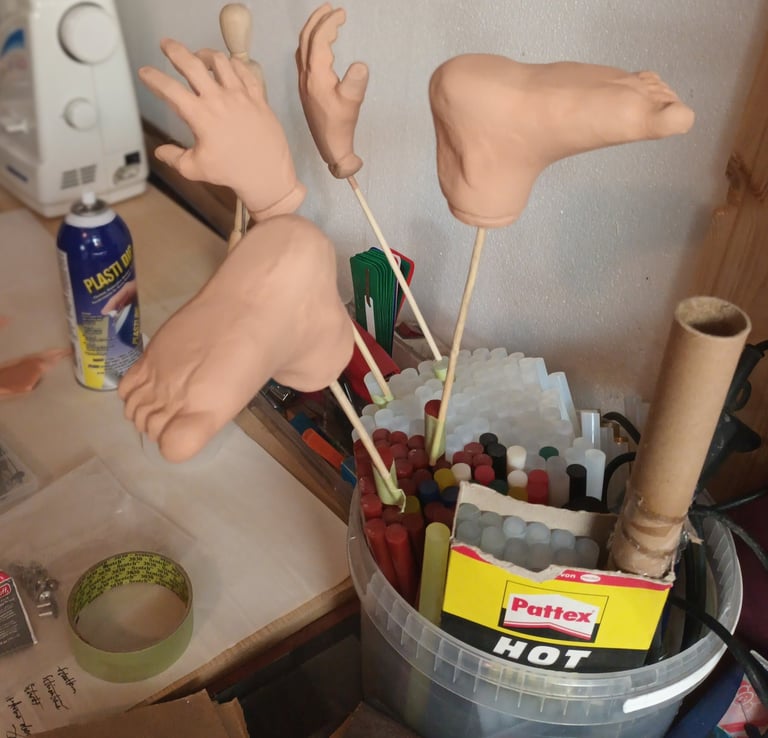

Give them a smaller seem to attach it to the fabric later. Prime and paint hands and feet carefully.
Now you just need to put all parts together :)

To give body, hands and feet the exact same color, use Plasti Dip on the fabric body, flat all fibers with your finger and paint it, too!
extra tips for doll-crafting
Don't be thrifty with darning cotton. If the body, especially the torso, is still unstable with the heads weight, insert a pelvic with connected spine and head holder to stabilize it.
If you cut a turned V in the back out of a normal wig, you can make it fit to a doll sized head! ;-)
Onlineshop
Social Media
Contact
© 2026 | The reproduction of any content without my permission is prohibited.
